This documentation is for Macro Recorder v5 beta. For the current production version 4 documentation, click here.
Installation
Macro Recorder is available for Microsoft Windows and Apple macOS.
Windows installation
To install Macro Recorder on Windows:
- Download the installation file.
- Double-click the installation file and follow the on-screen instructions.
- Setup offers you to install the software for all users on the computer or restrict installation to your specific user account (other user will not be able to use the software).
- Double-click the program file to launch Macro Recorder.
- If you purchased a license, register your license key.
The installation program can be launched with the command line parameter /SILENT, /VERYSILENT, /SUPPRESSMSGBOXES which instructs setup to be silent or very silent. When Setup is silent the wizard and the background window are not displayed but the installation progress window is. When a setup is very silent this installation progress window is not displayed. Everything else is normal so for example error messages during installation are displayed (more info).
You can also run Macro Recorder from a USB drive in portable mode (video tutorial),
Portable use
To run Macro Recorder from a USB thumb drive:
- Download the Portable Edition.
- Extract the ZIP archive contents into any file directory on your portable device.
- Launch "MacroRecorder.exe" from the USB device.
- If you have purchased a license key, register your USB thumb drive installation.
The portable mode is indicated in the Macro Recorder title bar.
Portable mode can be enforced by command-line parameter -portable.
Always shut down Macro Recorder before unplugging the USB drive to prevent data loss!
Portable use with PhraseExpress
To use Macro Recorder in portable mode together with PhraseExpress, do not change the name of both program directories and place them next to each other in the same folder level as shown in the screenshot:
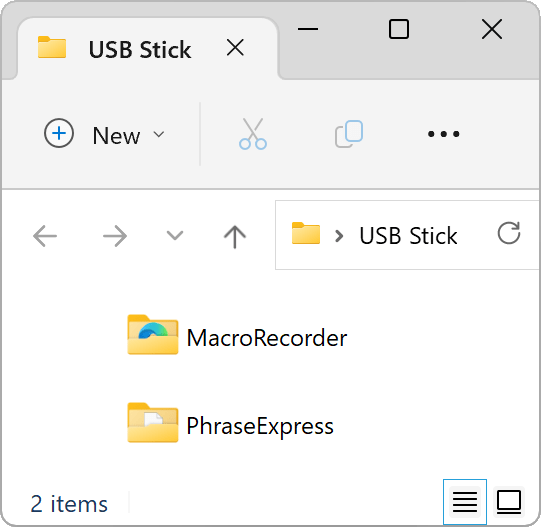
Do not rename the directories — Otherwise either program will not find the other one.
You can also run PhraseExpress and Macro Recorder in portable mode from a hard disk (for example in restricted environments):
MacOS installation
To install Macro Recorder on a Mac:
- Download the Mac installation file.
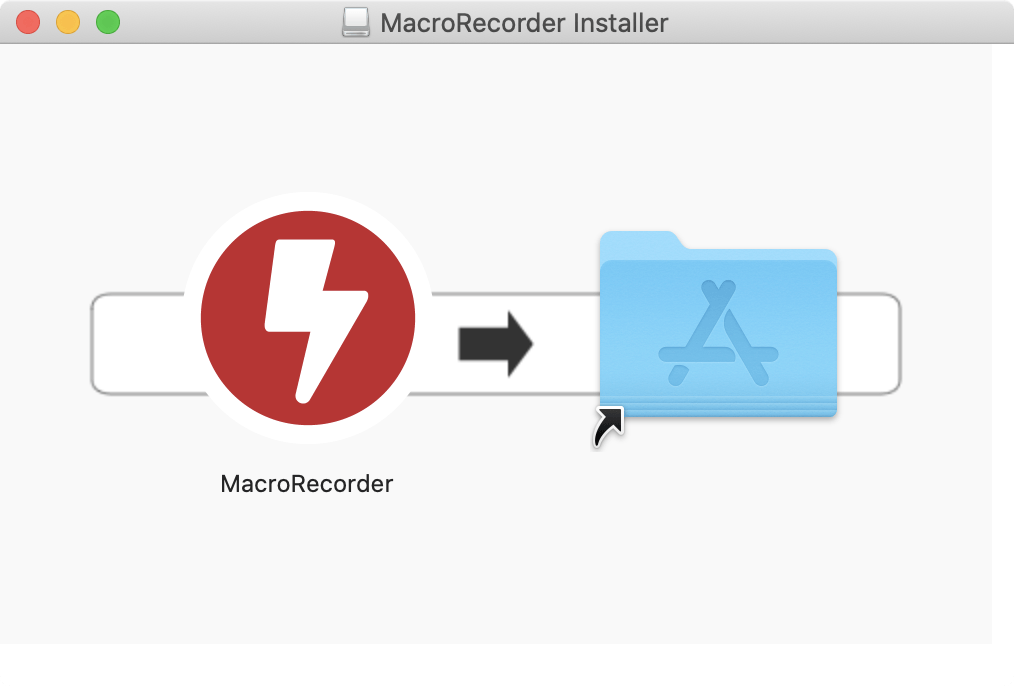
- Double-click the setup program to open the installer.
- Drag the Macro Recorder application icon from left to right into the application folder:
- If you purchased a license, register your license key.
Important macOS settings
Macro Recorder must be configured in macOS settings to be granted access to following system permissions:
- Accessibility – Required to capture and record keyboard input and hotkeys.
- Screen Recording – This setting name is somehow misleading as it also includes detection of cursor position, program window names and window focus changes.
- Full disk access – Required to save automation files.
Macro Recorder never transmits your files or mouse/keyboard input over the internet (see our privacy policy).
The configuration procedure differs between different macOS version as Apple moves settings around and rename menu items:
MacOS 13-15
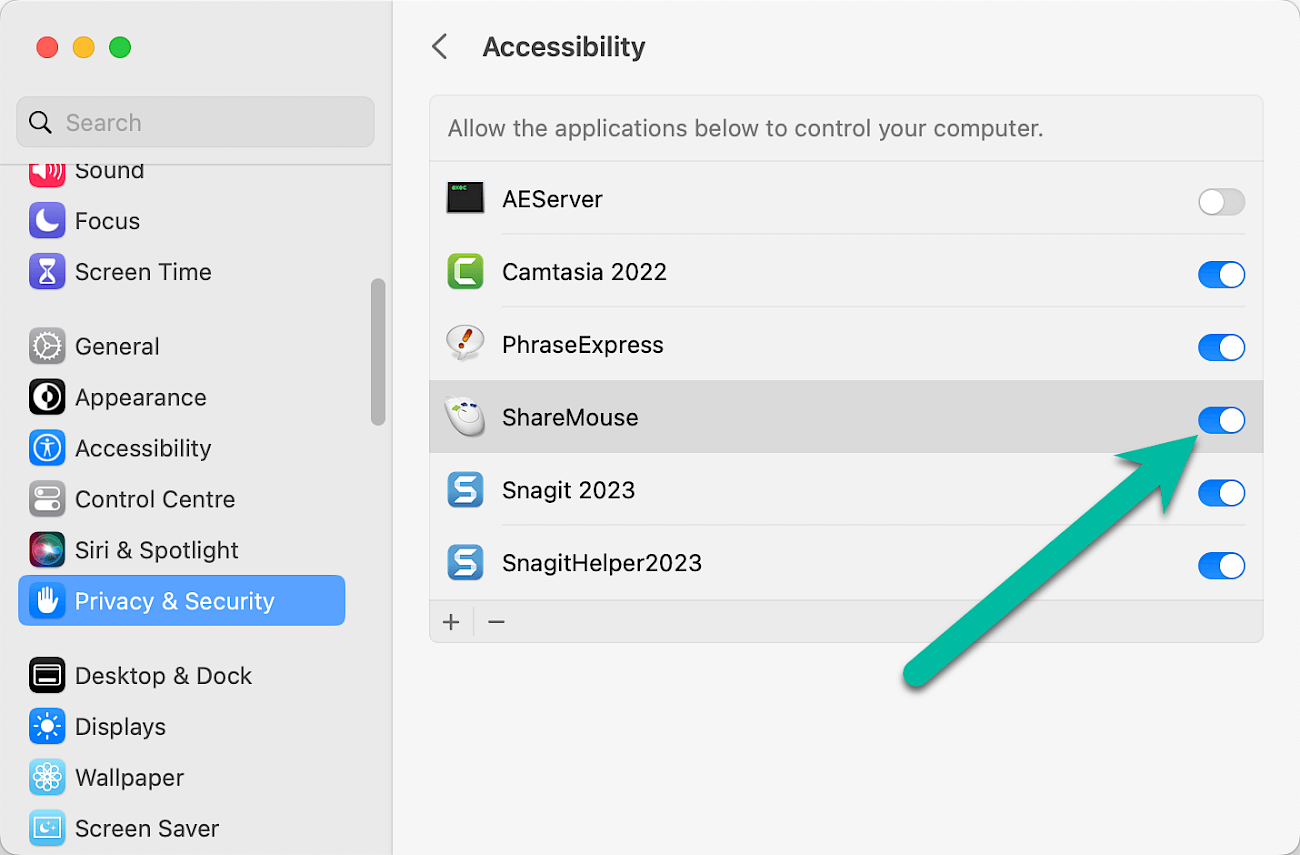
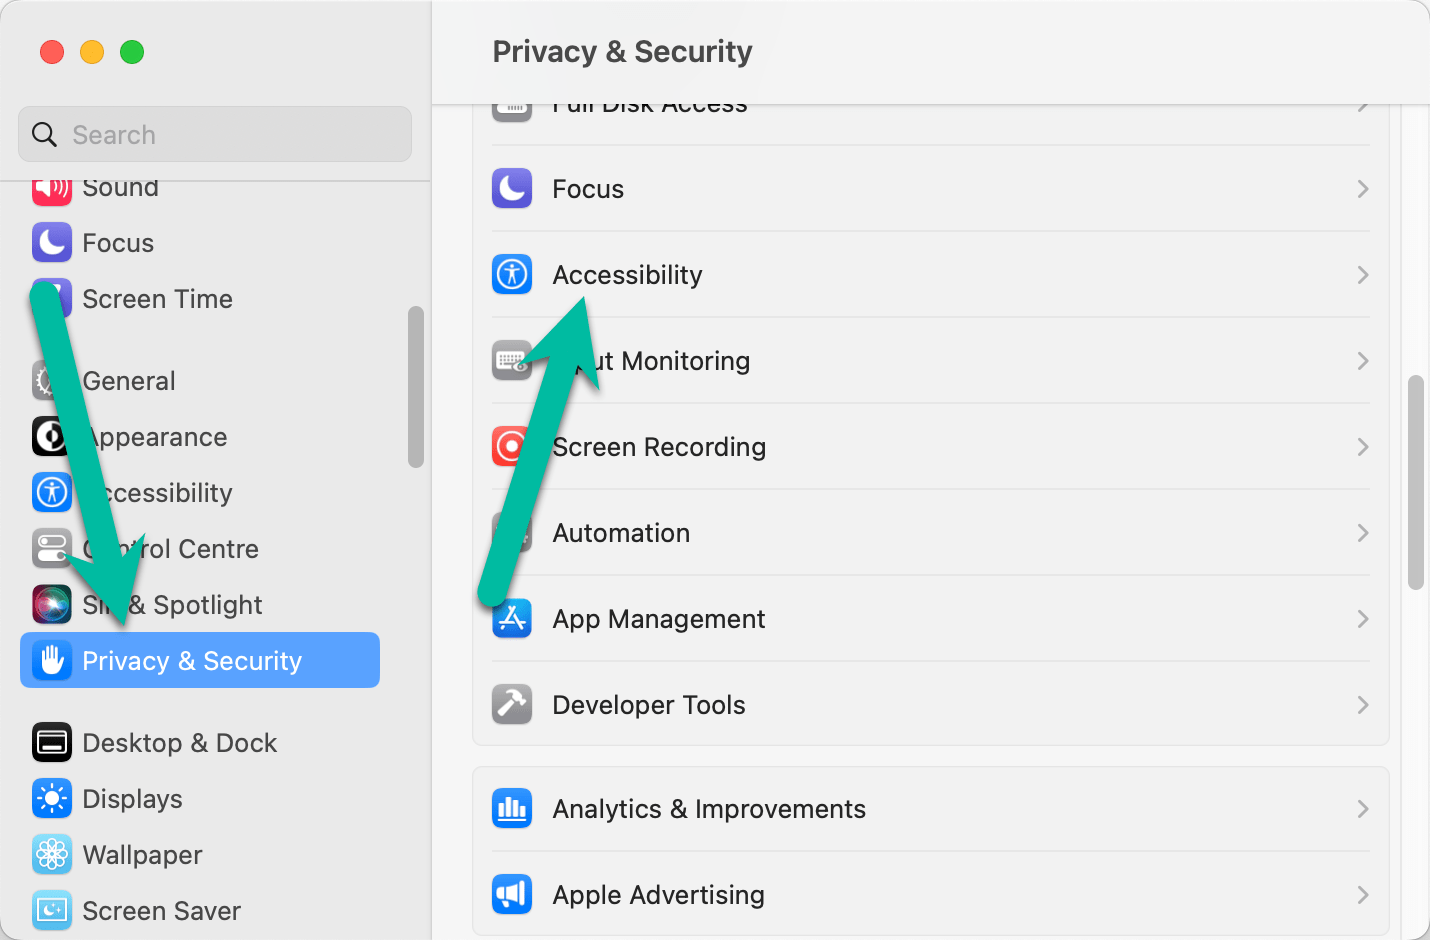
- Open the macOS "" and select "Privacy & Security » Accessibility":

- In the list of applications, lookup "Macro Recorder" and make sure that the option is enabled:
- Select "Screen Recording" on the right, add Macro Recorder to the list and make sure that it is checked.
- Select "Full Disc Access" on the right, add Macro Recorder to the list and make sure that it is checked.

MacOS 11/12
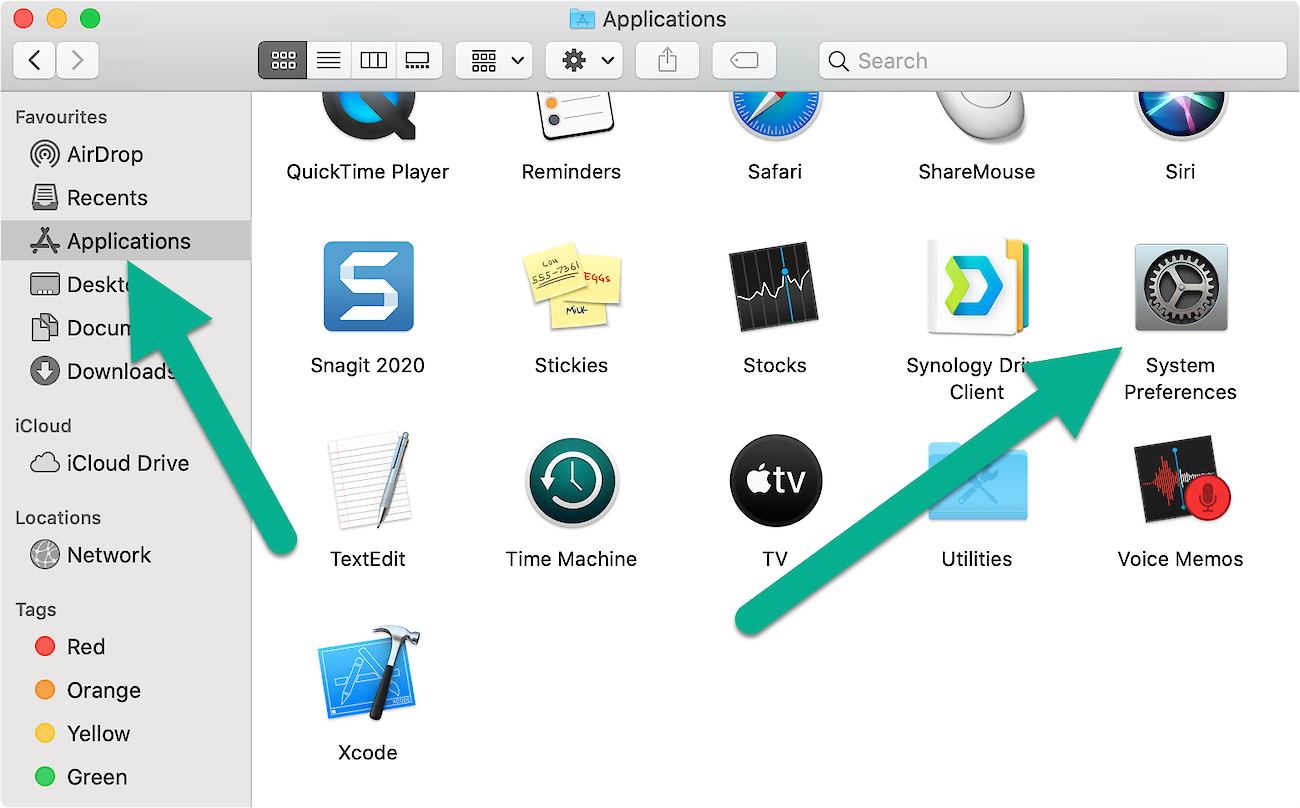
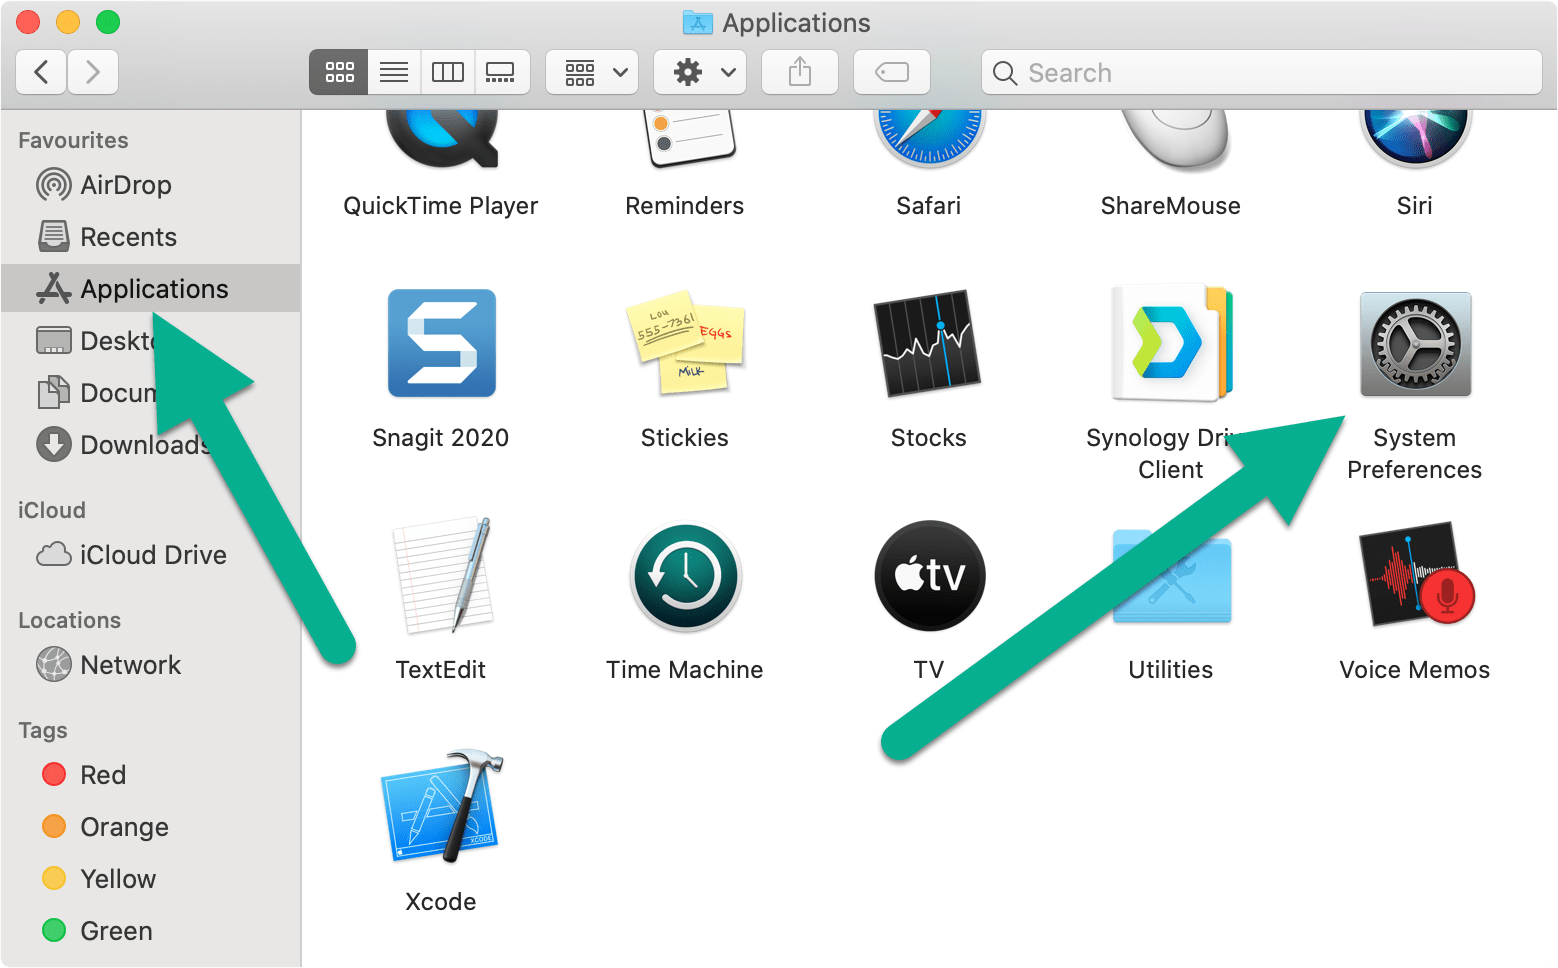
- Open the macOS System Preferences:
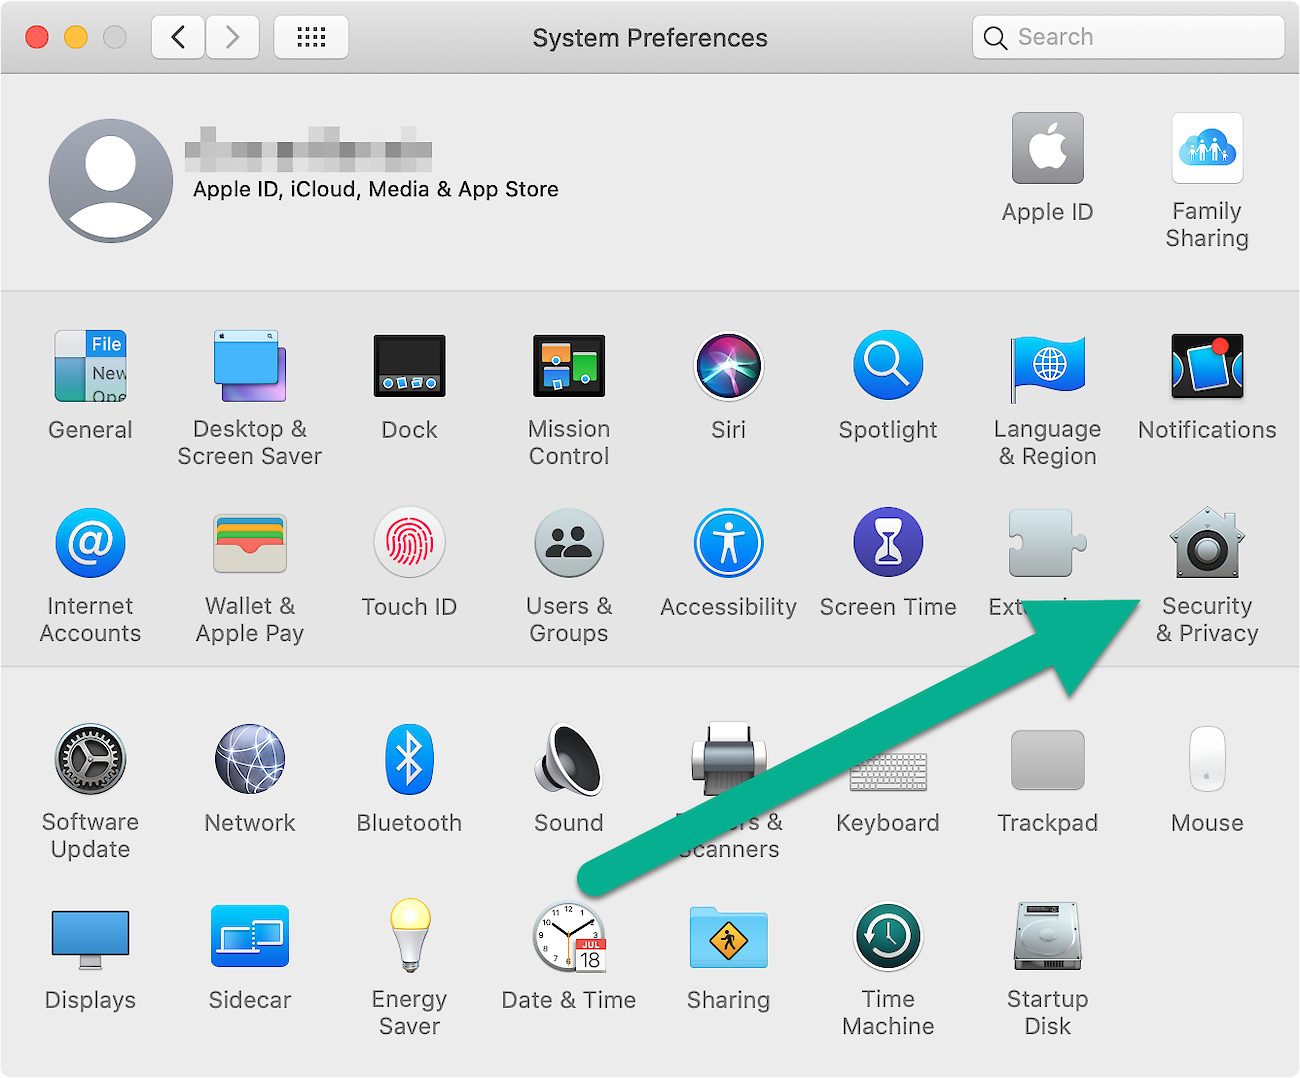
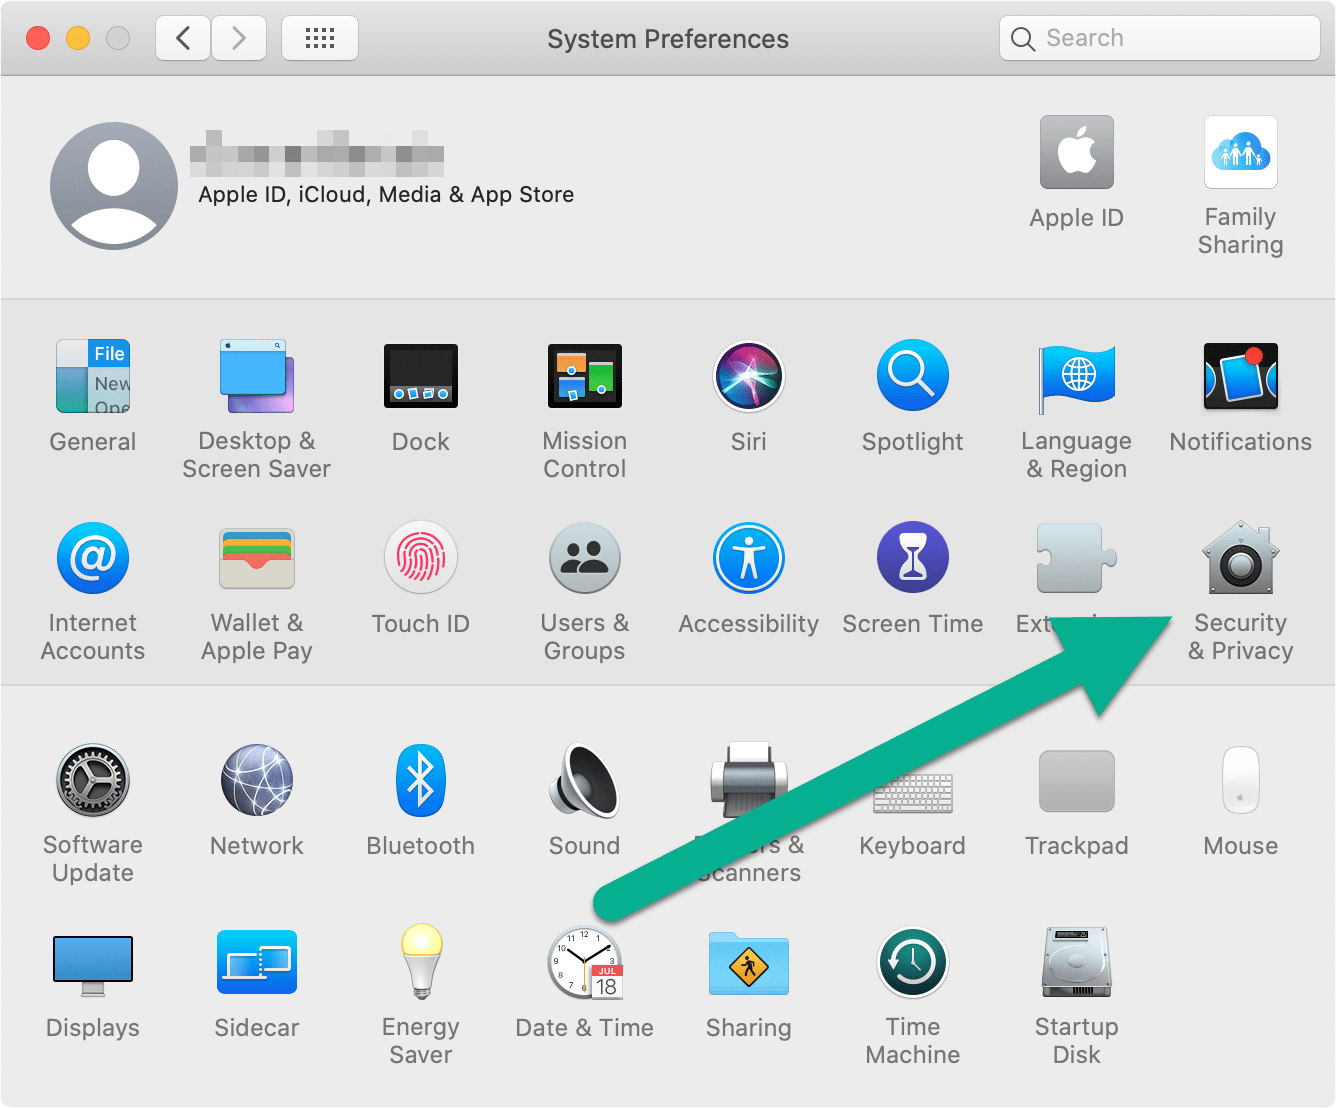
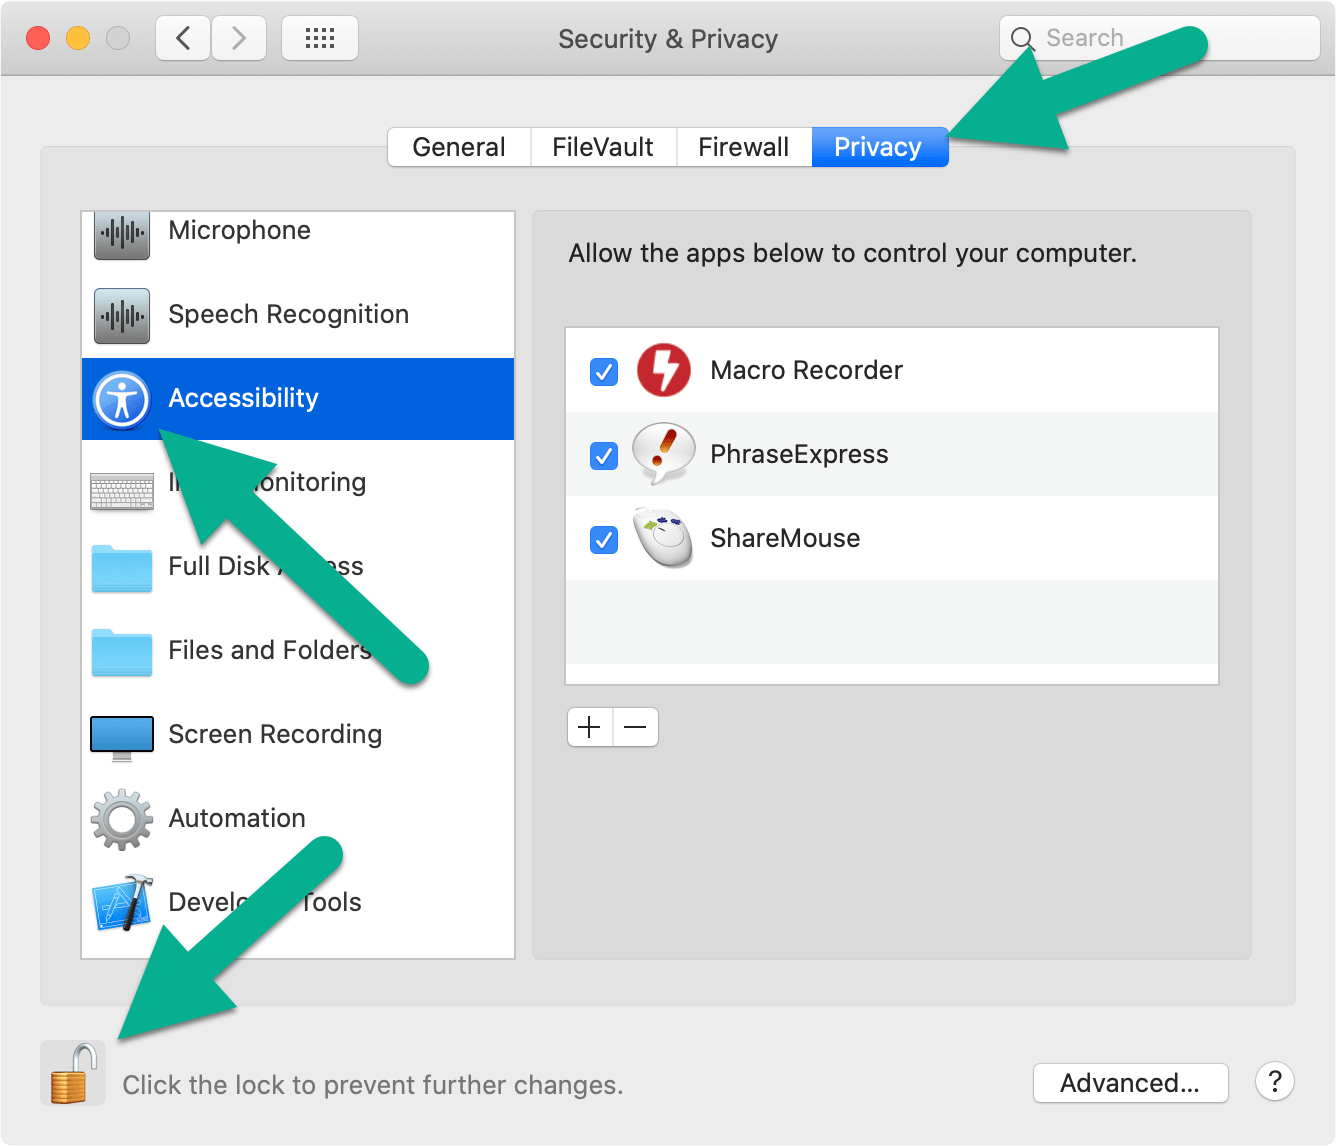
- Switch to section "Security & Privacy":
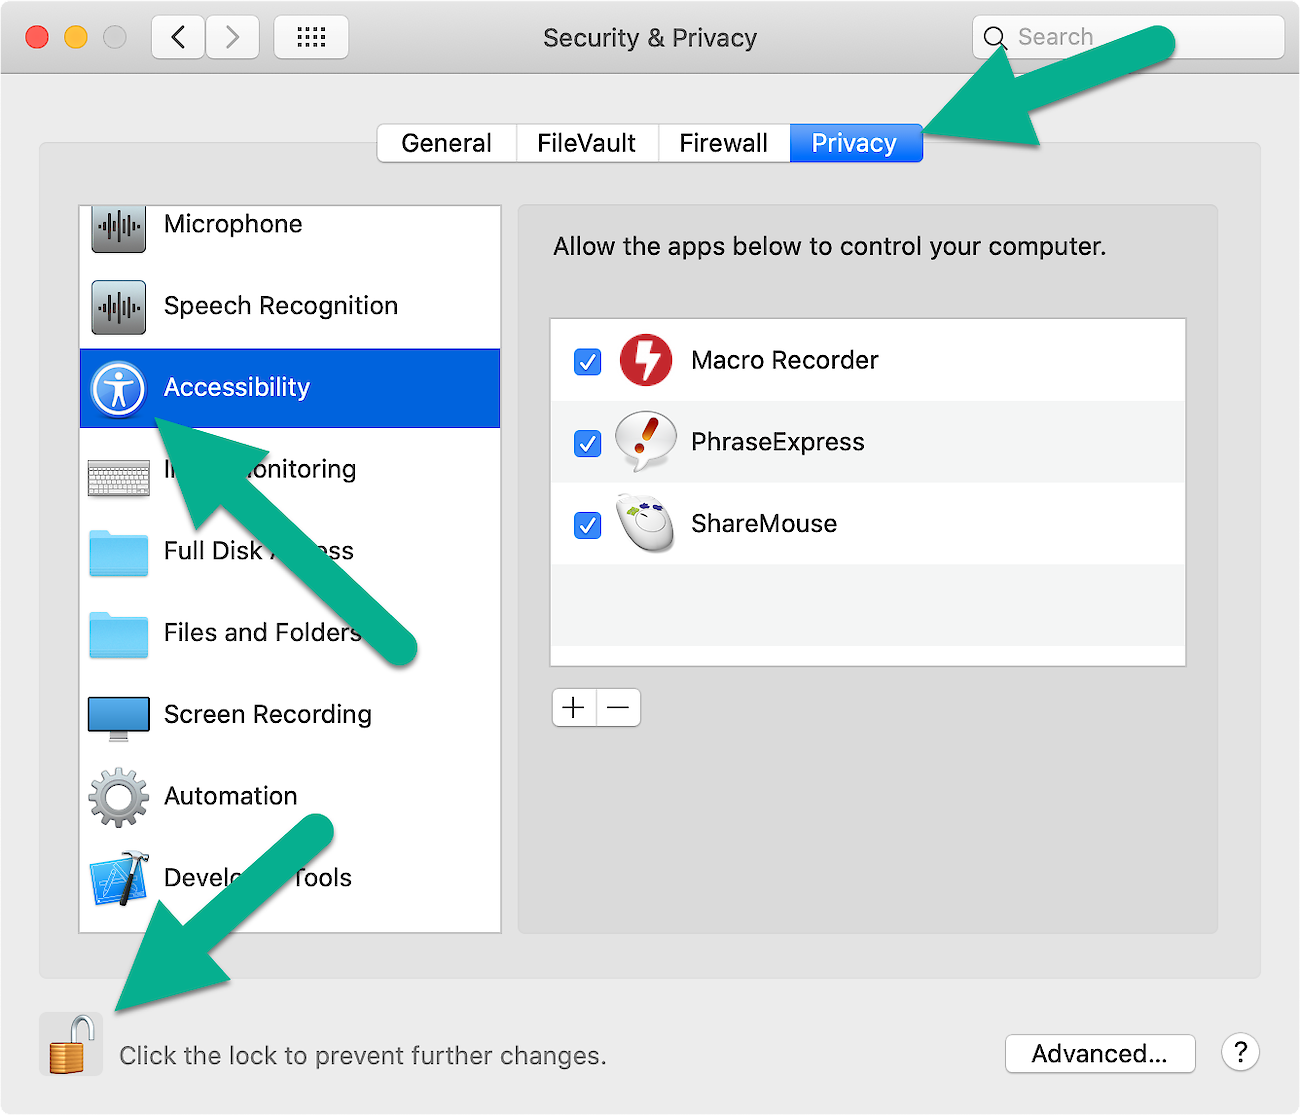
- Click the "Privacy" tab, unlock the padlock in the lower left, Then, on the left, click section "Accessibility" and add Macro Recorder to the list of programs to enable Macro Recorder to automate the mouse and keyboard:
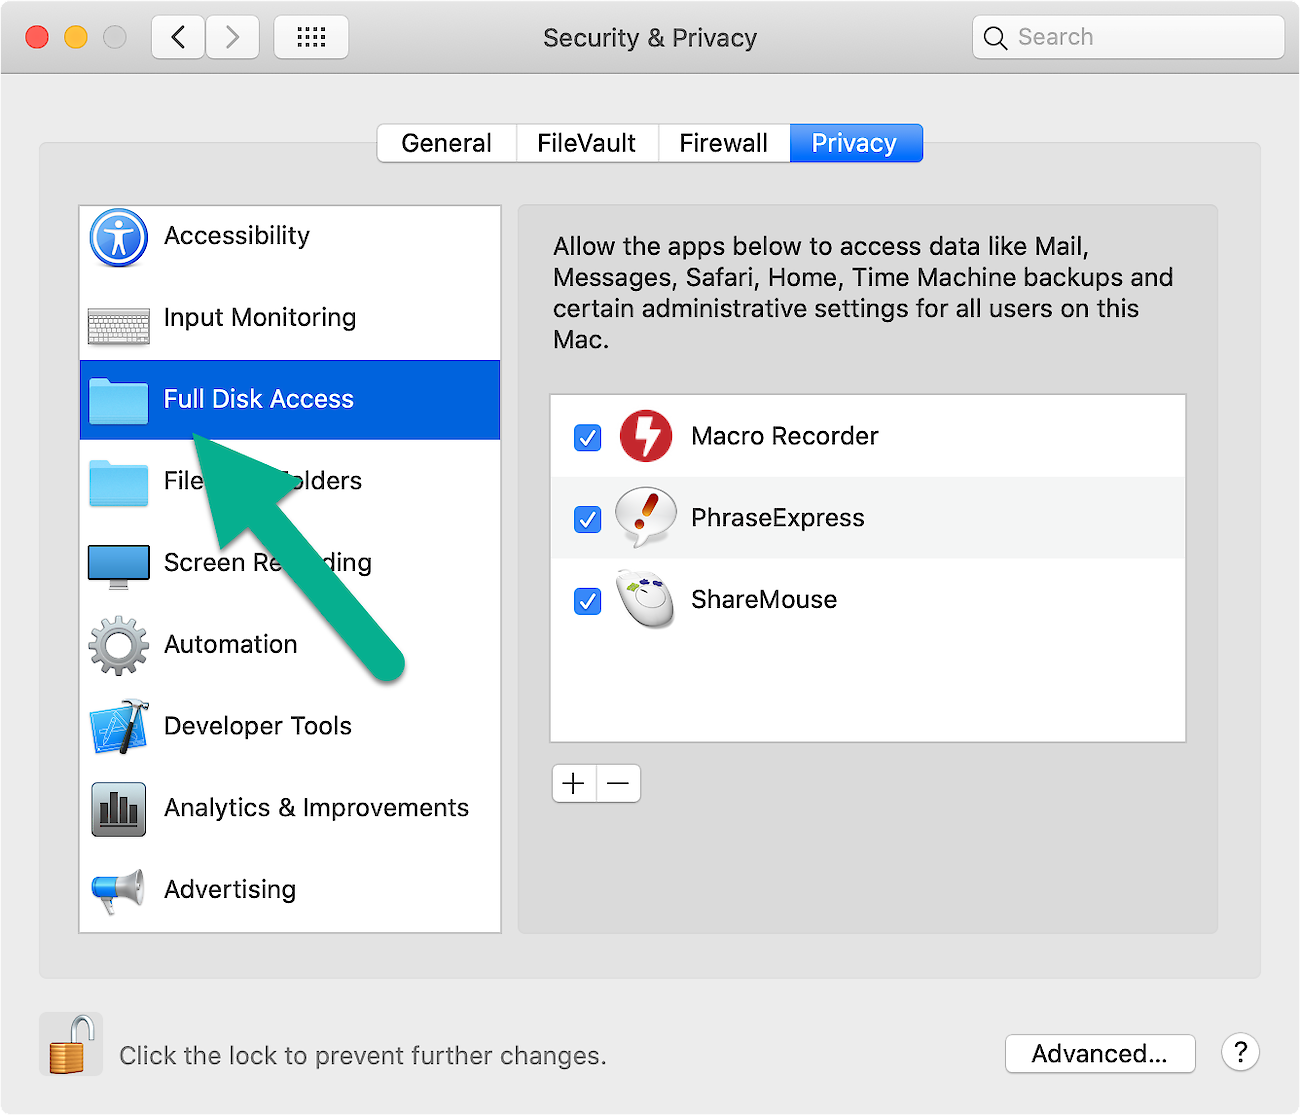
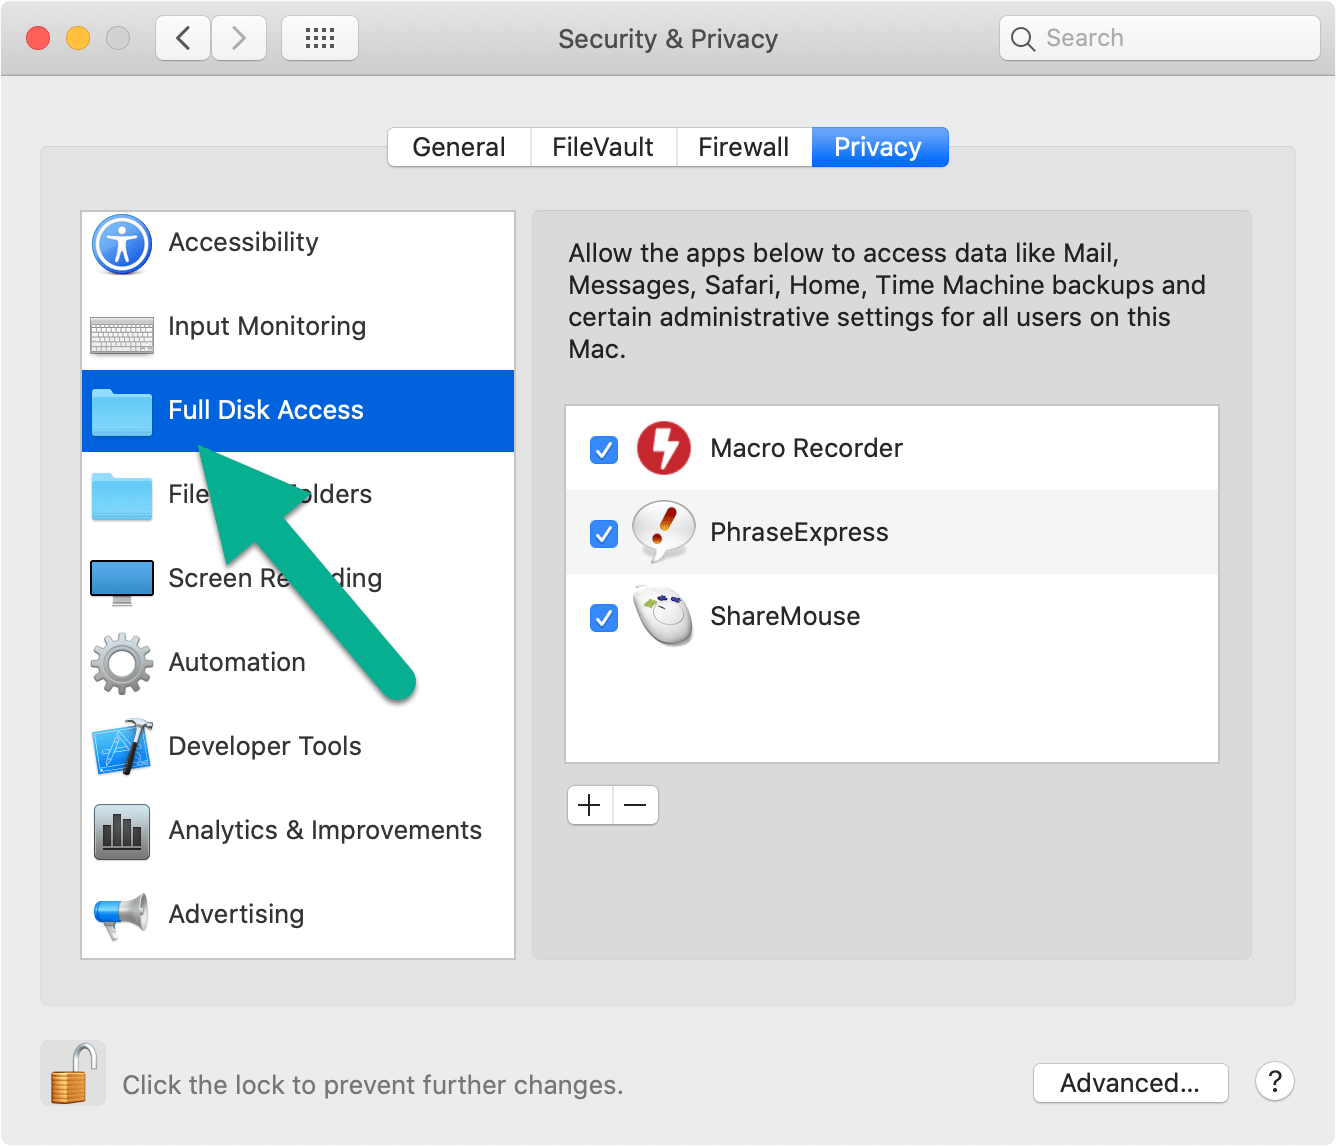
Make sure that the checkbox is ticked for Macro Recorder. - Optionally click section "Full disk access" and add Macro Recorder to the list of programs if you wish, that Macro Recorder can save files on your Mac:
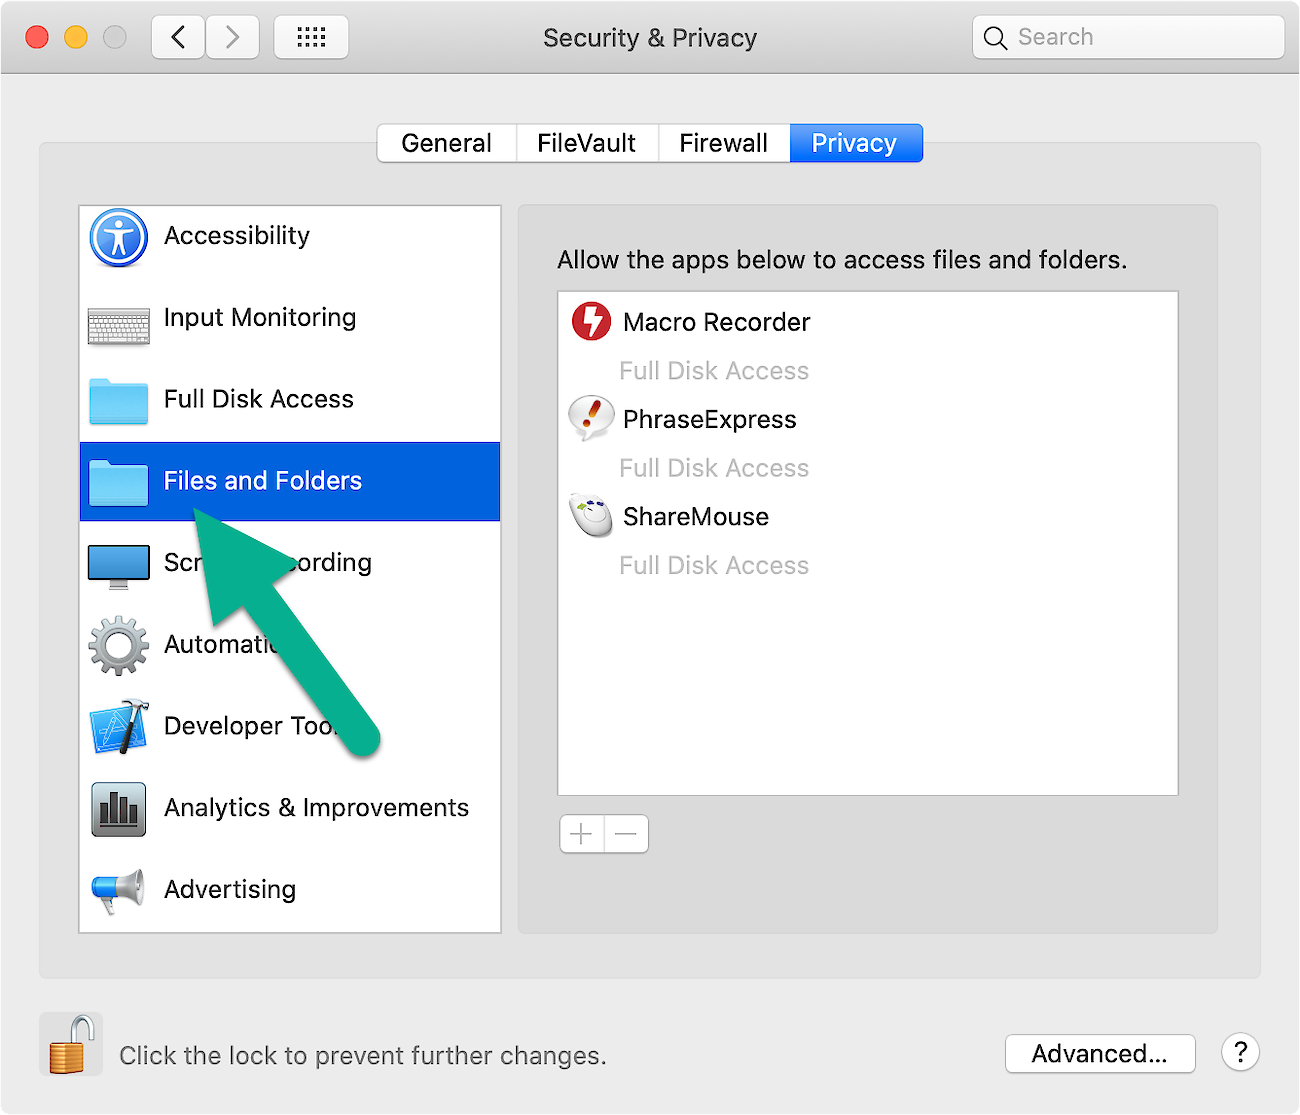
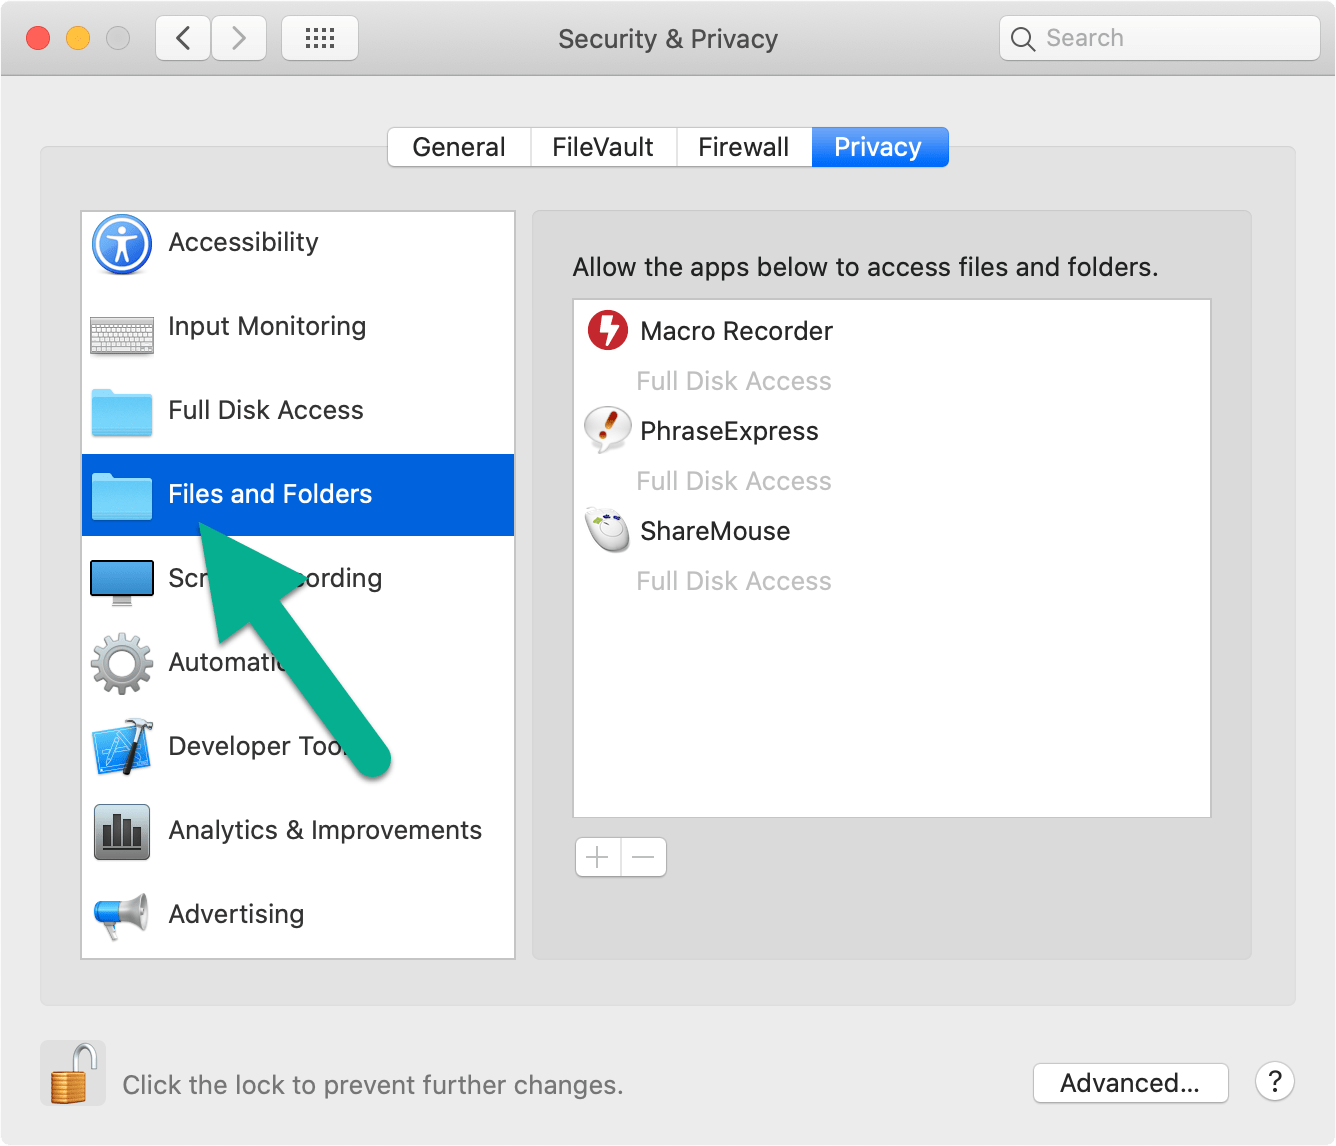
Make sure that the checkbox is ticked for Macro Recorder. - On the left, click section "Files and Folders" and make sure that Macro Recorder is added to the list to enable Macro Recorder storing macro recording files on your Mac:
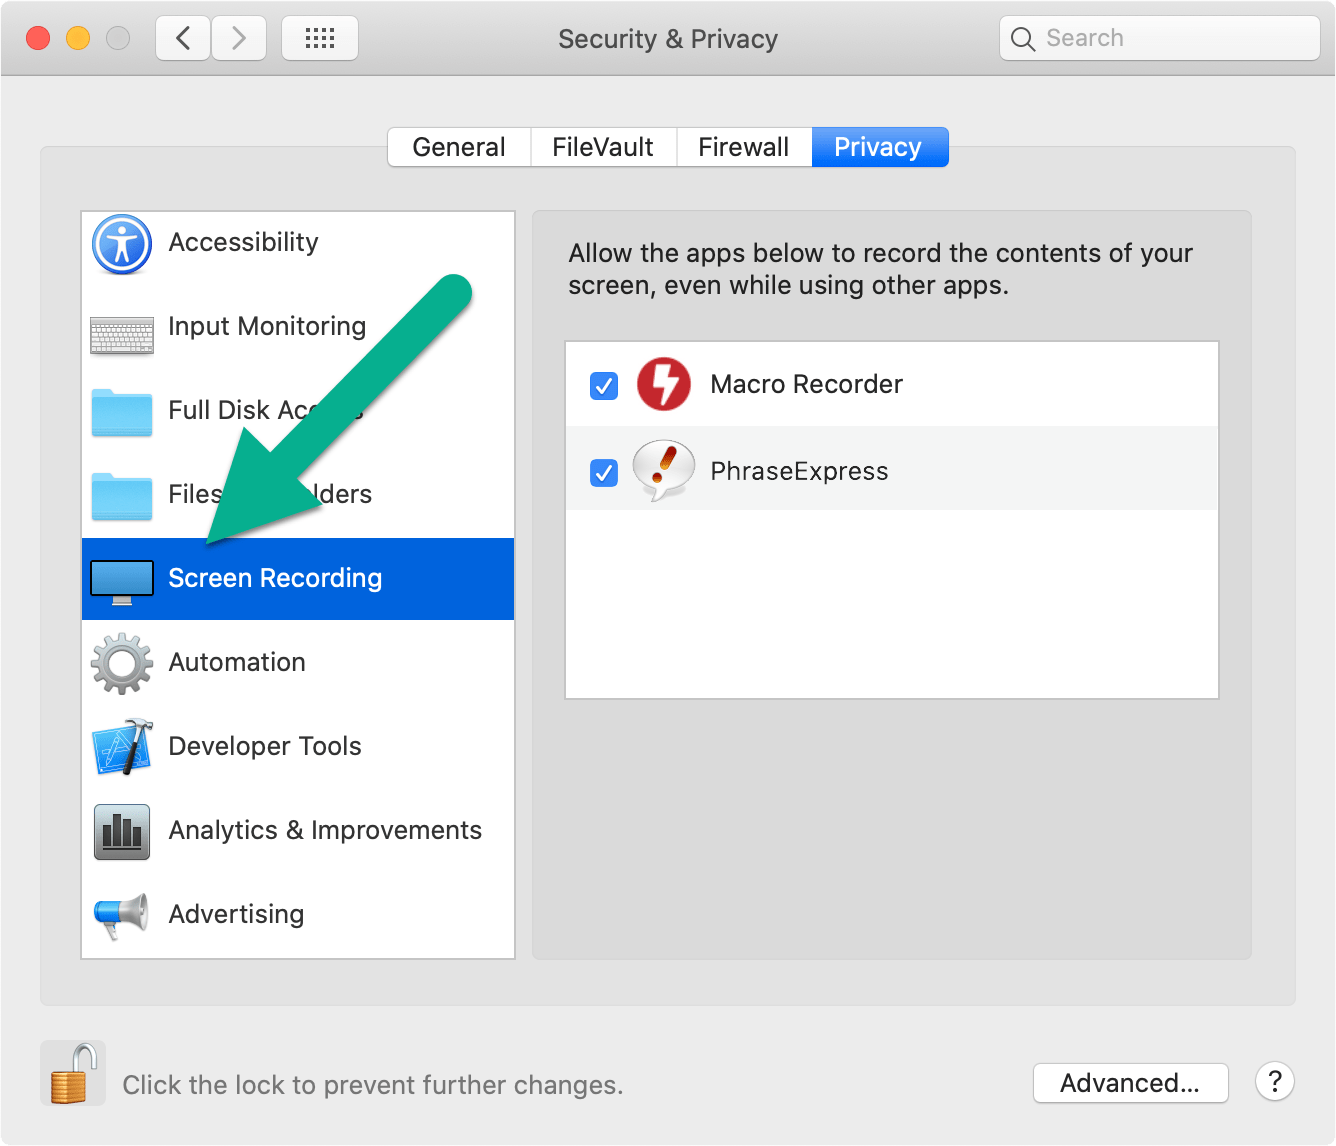
- On the left, click section "Screen Recording" and add Macro Recorder to the list of programs:
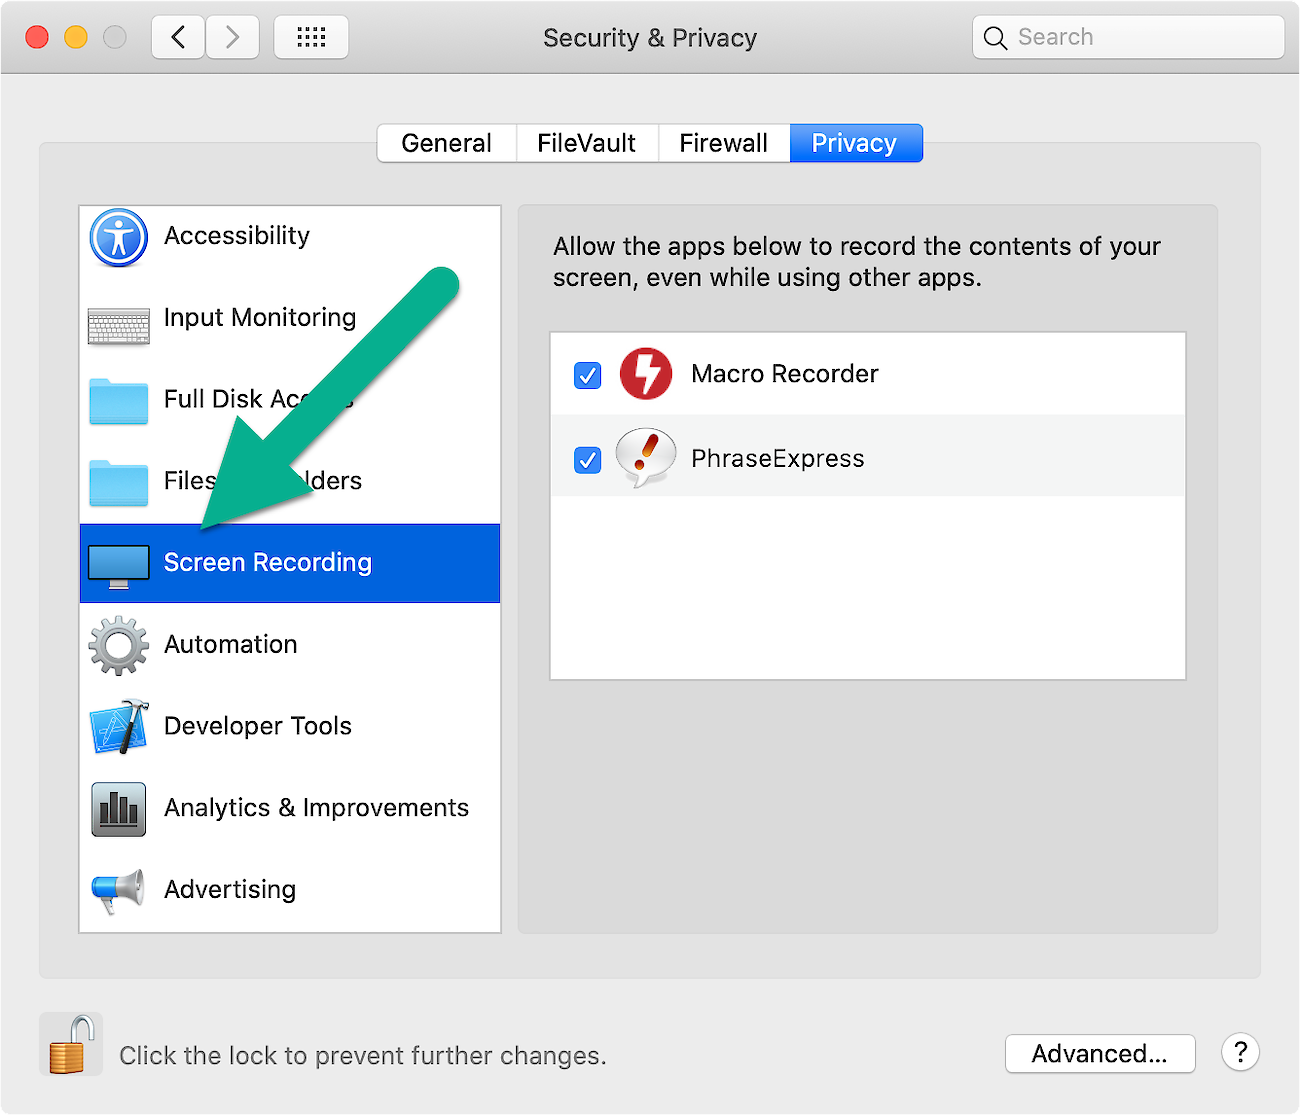
Make sure that the checkbox is ticked for Macro Recorder. - On the left, click section "Automation" and enable the Option "System events" underneath the Macro Recorder entry to enable Macro Recorder automating program window focus, position and size. MacOS may require confirmation for each program you automate with Macro Recorder.
Macro Recorder never transmits your files, desktop contents or mouse/keyboard input over the internet and it can be blocked in the firewall if in doubt (see privacy policy).
Troubleshooting macOS system permissions
The macOS system permissions may not work, although the settings seem to be correct. This can occur, for example, after a macOS and/or Macro Recorder update, since macOS may consider an update as a unknown new software.
Solution:
- Quit Macro Recorder .
- Repeat the above macOS security settings by adding Macro Recorder again (as described above) with the + button, regardless if the entry already exists! This seems counter-intuitive, but may fix issues with the macOS preferences database in some cases.
- Restart the Mac.
If this doesn't help, delete Macro Recorder from your computer, remove all Macro Recorder entries in macOS Security Preferences, reinstall Macro Recorder and do the security settings again. Installing Macro Recorder in a different directory may also help.
Experts only: The macOS security and privacy database sometimes seems to be(come) unstable. To initialize the system permission database (for all apps!), use the command "sudo tccutil reset Accessibility" in the macOS Terminal App.
Upgrade
Newer Macro Recorder versions can be safely installed over an existing installation.
Mac users beware! Apparently macOS sees an upgrade as a new, unknown software and therefore you have to delete the old Macro Recorder entries from all areas of the OSX security settings and add it back manually using the +- button. We wish this would be more comfortable, but we have no influence here.